Introduction
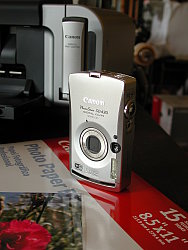
Like its most recent predecessors, the Canon PowerShot SD30 Digital ELPH stands tall, replacing the SD20's fixed lens with a 2.4x zoom. Smaller if not thinner than many subcompacts, it uses a dock for USB transfers, to charge its Li-ion battery and for A/V output. Available in black, red, gold, or violet body colors, the 5.0-megapixel SD30 relies on a 1.8-inch LCD instead of an optical viewfinder for composing shots. Recording modes include the extremely unusual (and frankly, rather cool) "My Color" modes that allow you to selectively replace any color in your photo with a different one, or to make the image black and white with the exception of a single color. Overall, the PowerShot SD30 is one of the more appealing subcompact digicams we've seen. Read on for all the details!
Camera Overview
The new Canon PowerShot SD30 features the great looks and sharp design that are a signature of Canon's ELPH cameras. The "Perpetual Curve Design" of the SD30 has few flat surfaces or right-angled corners on the camera body -- consequently giving it a very smooth, comfortable feel in your hands. Very compact and quick on the draw (thanks to a smoothly operating retractable lens design), the Canon SD30 is a convenient point-and-shoot digital camera with a handful of extra exposure features for added flexibility, including a few features that you might not use every day, but that add some "wow" factor. With the lens retracted, the Canon SD30's front panel is smooth and pocket friendly, and its all-metal body is rugged and durable (although it will show scratches, so buy a soft case if this concerns you). Equipped with a 5.0-megapixel CCD, the Canon SD30 captures high quality images, suitable for making sharp prints as large as 8x10 inches with some cropping. Smaller image sizes are also available for email transmission or Web applications, and a movie mode captures video clips with sound.
The Canon SD30 features a 2.4x, 6.3-14.9mm zoom lens, equivalent to a 38-90mm zoom on a 35mm camera. Aperture is automatically controlled, but the maximum setting ranges from f/3.2 at full wide angle to f/5.4 at full telephoto. A maximum 4x digital zoom option increases the SD30's zoom capability to 10x, but keep in mind that digital zoom decreases the overall image quality, because it simply crops out and enlarges the center pixels of the CCD's image. Image details are thus likely to be softer when using digital zoom. Focus ranges from 1.0 feet (30 centimeters) to infinity in normal AF mode, and from 3.9 inches to 1.6 feet (10 to 50 centimeters) in Macro mode. The Canon SD30 employs a sophisticated, nine-point AiAF (Artificial Intelligence Autofocus) system to determine focus, which uses a broad active area in the center of the image to calculate the focal distance (a feature I've been impressed with on many ELPH models and have been happy to see continued). Through the Record menu, you can turn AiAF off, which defaults the autofocus area to the center of the frame. Also built-in to the PowerShot SD30 is an AF assist light -- a very bright orange LED -- which aids the focus mechanism in low light when it's enabled via a menu option. For composing images, the SD30 uses its 1.8-inch color LCD monitor. The LCD reports a fair amount of camera information, but excludes exposure information such as aperture and shutter speed.
Because the ELPH line is designed for ease of use, exposure control is automatic, increasing the line's appeal to point-and-shoot users. The Canon PowerShot SD30 follows this trend, including a series of unique Scene modes, but does provide a few exposure adjustments in its Manual mode. Main camera modes are controlled by a mode switch at the top of the camera's rear panel. Choices include Playback, Movie and Record. Still Recording mode includes Auto, Manual (similar to Program Auto), Macro, Portrait, Landscape, Night Snapshot, My Colors, and Scene (with choices being Kids & Pets, Indoor, Foliage, Snow, Beach, Fireworks, and Underwater). Shutter speeds range from 1/1,600 to 15 seconds (with the Long Shutter option on). With image review enabled, a small histogram is displayed along with the image to help evaluate exposure. Slow shutter speeds of 1.3 seconds or slower automatically invoke a Noise Reduction system to eliminate excess image noise in longer exposures. In straight Auto mode, the camera controls everything about the exposure except for file size, flash, etc. Manual mode on the PowerShot SD30 provides more hands-on control, with White Balance, Exposure Compensation, ISO, and some creative effects, but it isn't true manual control because the user is not allowed to set -- or even to know -- the aperture or shutter speed settings. Camera operation is straightforward, as you typically just point and shoot most of the time. Pressing the Shutter button halfway sets focus and exposure, and a focus confirmation target and beep let you know when the camera is ready to take the picture.
The special automatic and additional Scene modes on the PowerShot SD30 provide creative options and tweak exposure variables to accommodate common photographic situations. In Portrait mode, the camera opts for a large aperture to blur the background, making the subject stand out. Landscape optimizes camera settings for wide, expansive scenes. Night Snapshot mode uses the camera's flash and higher sensitivity if necessary to try to obtain an exposure with your subject and a dark background correctly exposed. My Colors provides nine creative options, including Positive Film, Lighter Skin Tone, Darker Skin Tone, Vivid Blue, Vivid Green, Vivid Red, Color Accent, Color Swap, and Custom Color. The Scene submenu includes even more options. Kids & Pets mode opts for a faster shutter speed to freeze quick motion. Indoor mode biases the white balance system toward tungsten or fluorescent lighting, attempts to reduce camera shake with wider apertures and higher sensitivity, and avoids using flash where possible. In Foliage mode, the Canon SD30's saturation is boosted to offer bold colors in foliage. Snow and Beach modes both bias exposure so that the camera is not fooled into underexposing images because of a bright background; Snow mode also adjusts white balance appropriately. Fireworks mode uses a long exposure to capture the trails of fireworks. Finally, Underwater mode -- designed for use with an optional underwater housing -- uses a white balance setting appropriate for correcting the cold tones of an underwater photo, and also tries to avoid using the camera's flash.
The nine options in the PowerShot SD30's "My Colors" mode, available for both still image and movie shooting, are worth a closer look. The Positive Film setting attempts to replicate the bold colors of positive film in the Red, Green, and Blue channels. The Lighter Skin Tone and Darker Skin Tone settings attempt to alter skin tones appropriately, without affecting the rest of the photo. The Vivid Blue, Vivid Green and Vivid Red options emphasize saturation in one channel only. Most unusual are the Color Accent and Color Swap features, however. In Color Accent mode, you place a small square in the center of the camera's LCD over a color you want to accent, and press the left arrow on the Four-way navigation controller. A narrow band of colors surrounding the color you selected will remain untouched in the final image; the rest of the photo will be in black and white. In Color Swap mode, you similarly select two colors with the square at the center of the LCD (one by pressing the left arrow; the other with the right arrow). The Canon SD30 will then replace one color with the other in your final image -- for example allowing you to make a green car appear blue. Both effects allow a little fine control over the color you selected using the left arrow key; you use the up and down arrows to slightly adjust the color you want to accent or swap. You can't, however, fine-tune the color you want to replace the swapped color with for Color Swap mode. Both the Color Accent and Color Swap modes are rather fun, and they're definitely very unusual, but the effects can be rather unpredictable. You generally end up with a slight fringe of the old color surrounding your replaced color in Color Swap mode, and it can be difficult to control the exact color you want to affect in both modes. For this reason, it is rather nice that Canon has provided the ability to set the SD30 through the Record menu to capture a duplicate copy of images captured in My Colors mode, without any color changes made. If you end up throwing away your color-altered image, you'll still have your original source image to change with an image editor, or just enjoy as a photograph. Finally, the Custom Color mode allows you to manually fine-tune the saturation of colors in the Red, Green, and Blue channels (plus the saturation of skin tones), with five steps of control over each.
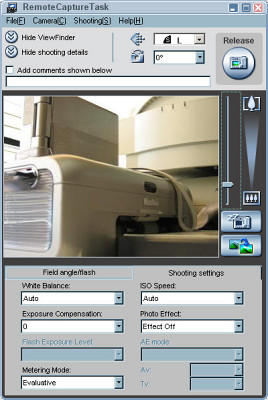
The Canon PowerShot SD30 uses an Evaluative metering system by default, which means that the camera divides the image area into zones and evaluates both contrast and brightness among all the zones to determine the best overall exposure. A Spot metering option ties the exposure to the very center of the frame, and is useful for off-center or high contrast subjects, letting you pinpoint the exact area of the frame to base the exposure on. There's also a Center-Weighted metering option on the PowerShot SD30, which bases the exposure on a large area in the center of the frame. Exposure Compensation increases or decreases the overall exposure from -2 to +2 exposure equivalents (EV) in one-third step increments. A White Balance option offers Auto, Daylight, Cloudy, Tungsten, Fluorescent, Fluorescent H, and Custom (manual) settings. The Canon SD30 also offers a creative Photo Effects menu, which adjusts sharpening, color, and saturation. Sensitivity equivalents include 50, 100, 200, and 400 ISO settings, as well as an Auto setting. The SD30's built-in flash operates in Auto, Red-Eye Reduction, Forced On, Forced On with Red-Eye Reduction, Suppressed, and Slow-Synchro modes.
A two- or 10-second self-timer option counts down by flashing a small LED on the front of the Canon SD30 before firing the shutter, giving you time to duck around the camera and get into your own shots. In addition, a Custom timer function allows you to set the camera for a delay of 0-10, 15, 20, or 30 seconds, and a number of photos to be captured once the delay has been elapsed (from one to 10). After the timer expires, the camera will capture the number of photos requested with an interval of approximately one second between photos, and the flash does recharge quickly enough to capture 10 photos in a row with flash. This could be rather nice for people trying to take photos of a large family gathering. Thirty seconds gives you plenty of time to get into your photo, and with the ability to capture 10 images with one press of the shutter, there's a better chance you'll get a shot where nobody blinked or made a funny face. This is an innovative feature that brings the fun of the old photo booth into the digital era and makes it portable. As such, it should be renamed "Photo Booth Mode" to make it better understood by those most likely to use it. The tech-heads likely to find this mode are less likely to use it.
Stitch-Assist mode is the Canon SD30's panoramic shooting mode, which lets you shoot as many as 26 consecutive images. As each image is captured, a portion of it appears alongside a live preview of the current scene, helping you to line the next image up with a proper overlap. The series of images can then be "stitched" together into a single panoramic frame with the accompanying software. A Continuous Shooting mode captures a series of consecutive images (much like a motor drive on a traditional camera), at approximately one frame per second, for as long as the Shutter button is held down. The actual frame rate varies slightly with the resolution setting, and the maximum number of images will also depend on the amount of memory card space and file size.
The Canon SD30 also has three Movie Record modes, which record moving images with sound. Focus and optical zoom are fixed at the first frame, but you can use digital zoom while recording. Standard captures 640 x 480 images at 10 frames per second up to 1-GB. Compact captures 160 x 120 at 15 fps for emailing up to three minutes. My Colors captures 320 x 240 at 20 fps up to 1-GB. The PowerShot SD30's Playback mode allows editing movies longer than one second. You can save the new movie over the old one, or as a new file. During playback, you can also step through images frame by frame.
The My Camera settings menu lets you customize camera settings to a specific theme. Everything from the startup image to operating sounds can be assigned to a theme, either one of the pre-programmed themes or one downloaded from the camera software or stored on the memory card. The PowerShot SD30 also lets you record short sound clips in WAV format to accompany captured images, via the Sound Memo option, great for lively captions to vacation photos or party shots.
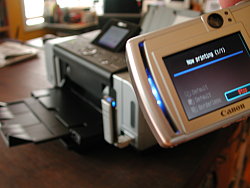
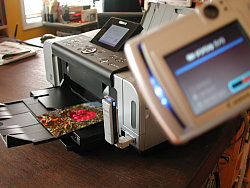
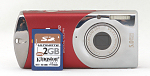
The Canon PowerShot SD30 stores images on SD memory cards (hence, the "SD" in its name). A 16MB card accompanies the camera, but I highly recommend picking up a larger capacity card, so you don't miss any shots. These days, a 128MB or 256MB card is a good tradeoff between cost and capacity. The camera utilizes a rechargeable lithium-ion battery pack for power, which accompanies the camera, along with the necessary battery charger. Because the Canon SD30 does not accommodate AA-type or any other off-the-shelf battery format, I strongly advise picking up an additional battery pack and keeping it freshly charged. The included dock functions as an AC adapter, charging the battery and powering the camera when downloading images. It's also where you connect the included USB cable or A/V cable connects the SD30 to a television set, for reviewing and composing images.
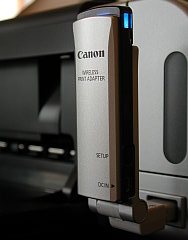
Also included with the Canon SD30 is a small wireless controller to control the camera when it is placed in the dock. Powered by a 3-volt lithium coin battery, the controller can manage playback on a television set when using the A/V cable, erase images, print when connected to a printer and download when connected to a computer via the USB cable.
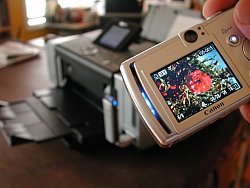
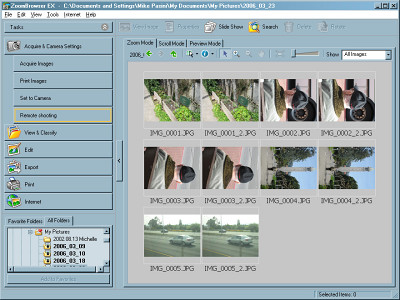
A software CD accompanies the PowerShot SD30, providing any necessary drivers and editing software for both Windows and Macintosh platforms. The CD holds Canon's Digital Camera Solution Disk version 25.0 and also features ArcSoft's PhotoStudio. The Canon SD30 is Digital Print Order Format (DPOF) and PictBridge compatible, with detailed print settings in the Playback menu. Canon offers a selection of direct-connect printers as well, which simplifies printing even more. And Exif Print optimizes print settings when images are captured.
Recommendation
The Canon ELPH series of digicams continues to be a popular option for many consumers, given its tiny size and reputation for great build and image quality. Although exposure control is mainly automatic, the availability of exposure times as long as 15 seconds and adjustable ISO on the PowerShot SD30 increases the camera's exposure versatility a great deal. The uncomplicated user interface and smooth styling helps novices and more advanced amateurs alike feel at home, with enough control over the exposure to make both happy. The Canon SD30 makes a great "all around" camera for anyone, and would make a good "second camera" for enthusiasts for those times when they don't want to lug along their full-size all-the-bells-and-whistles camera. All considered, the PowerShot SD30 is one of the better subcompact digital cameras currently on the market.
Design
 With gently flowing curves over most of the camera's body, the Canon PowerShot SD30's compact size is perfect for quickly stashing in a pocket or purse without worrying about damaging the rugged, all-metal body (though if you want to maintain that gorgeous finish, put it in a protective case first because it can get scratched). The retracting lens is a smart design that keeps the camera front completely flat when the camera is off, underscoring the camera's pocket-friendly design, while an automatic lens cover means you don't have to worry about smudging the lens or losing a lens cap. Measuring 3.78 x 1.78 x 0.94 inches (96.1 x 45.1 x 23.9 millimeters), the Canon SD30 should fit easily into the average shirt pocket. It weighs just 3.7 ounces (105 grams) without battery and memory card.
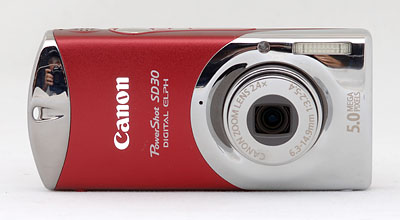
Several distinctive features on the front of the Canon SD30 identify it as an ELPH, with the lens off-center slightly toward the right, and the flash just above and to the right of it. A light emitter, directly above the lens, serves multiple purposes, including autofocus assist, red-eye reduction, and the self-timer countdown. The camera's telescoping lens moves into place quickly, projecting a little over half an inch from the front of the camera when powered on, and retracts fully within the camera when switched off to maintain a flat profile. (Startup time is a very fast 1.0 second.) The very small hole to the left of the PowerShot SD30's lens is the microphone. No real finger-grip is provided, so be sure to attach the accompanying wrist strap.
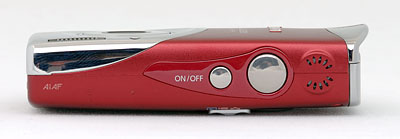
The Power button, Shutter button and speaker are located at the right of the PowerShot SD30's top and do not protrude noticeably.

On the right side of the PowerShot SD30 (as viewed from the rear) is the battery compartment door protecting both the battery and the memory card slot. The door is a painted metallic plastic, and fits very snugly back into place with a gentle press -- unlike many such doors on digicams that seem impossible to ever get properly closed after they've first been opened. Inside the SD30's battery / memory card compartment, the battery and SD memory card slots line up side by side. A small spring-loaded latch ensures the battery won't accidentally fall out when you open the compartment cover. Adjacent to the door is the wrist strap attachment eyelet.
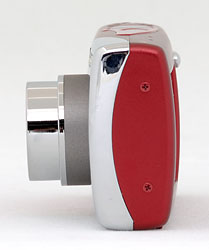
The opposite side of the PowerShot SD30 is basically bare, with only a couple of screws visible, but it lets the camera stand vertically on its end (although we wouldn't advise trying this on anything other than a perfectly level, smooth surface -- and even then not near an edge the camera could fall off). The text on the front of the camera and lens is actually oriented to be right-reading when the camera is stood on end.
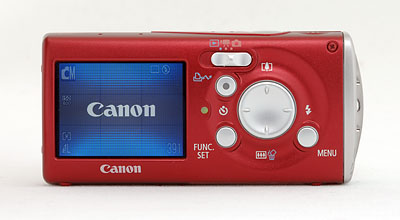
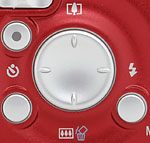
The remaining camera controls are on the SD30's rear panel, along with the LCD viewfinder. The 1.8-inch LCD monitor occupies the left side of the back panel with all the controls on the right. A three-position Mode switch at the very top of the camera's rear selects between Playback, Movie and Still mode. Below this is the Print / Share button, which features a blue LED in the center that lights when the camera is ready to print or transfer images, and blinks when either is in process. A Four-Way Arrow pad incorporates most of the quick settings, with the outside buttons handling navigation, Macro and Flash modes, and Zoom. The Function button is below and to the left of the Four-way Arrow pad, also serving as the Set button for making menu selections. Lower right of the PowerShot SD30's Four-Way Arrow pad is the Menu button.
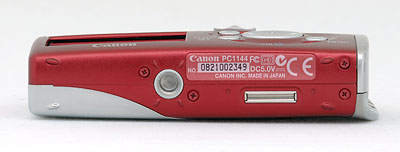
The Canon SD30 features a nice, flat bottom panel, which holds the metal tripod mount and the battery / memory card compartment. The tripod socket is off center to the camera body and the lens, not a great choice for panorama shooters since the mount is not below the center of the lens. But you can remove either the battery or memory card on a tripod-mounted SD30. Also on the bottom is the Camera Station Connector for the dock. The Connector provides AC power, USB connections and battery charging.
Camera Operation
The Canon PowerShot SD30's user interface is straightforward and relatively uncomplicated, with a similar menu setup and basic control philosophy as the rest of the current ELPH series. Frequently used camera's functions are controlled by buttons on the rear panel, with other settings controlled through the LCD-based Record menu. The Function/Set button provides access to the LCD menu's basic settings like image size, quality, and exposure compensation, which don't require you to sift through menu screens. The LCD menu system itself is quite efficient, as you view menu items organized in tabs instead of through a series of pages. Additionally, the Setup and My Camera menus are always available via the Menu button, regardless of the camera mode. With the instruction manual in-hand, it shouldn't take more than a half-an-hour to an hour to get comfortable with the camera.
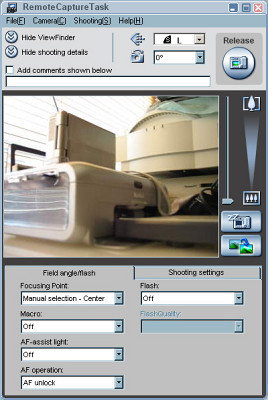
 Record Mode Display: In any record mode, the PowerShot SD30's LCD display shows either the image area with a limited information display (On), or selected information (Off). The Info Display option in the Tools menu toggles the display on or off. When the information display is active, it reports resolution and image quality settings, the number of available images, Record mode, orientation, and a handful of exposure settings (although not aperture or shutter speed). But even when off, it displays some settings like the low battery warning.
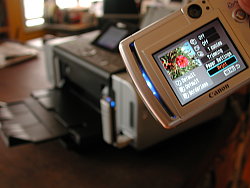
 Playback Mode Display: The PowerShot SD30's Playback mode offers three options, including the image only (Off), the image with information (Standard), and the image with expanded information and a histogram (Detailed).
External Controls

Shutter Button: Located on the top panel, this button sets focus and exposure when halfway pressed and fires the shutter when fully pressed. If the Self-Timer is activated, a full press of the Shutter button triggers the countdown.

Power Button: To the left of the PowerShot SD30's Shutter button on the camera's top panel, this button turns the camera on or off.

Mode Switch: At the top center of the rear panel, this switch controls the camera's operating mode, offering the following selections:
- Playback Mode: Replays captured images and movies, with options for image management and printing.
- Movie Mode: Captures moving images with sound in three different modes.
- Still Mode: Sets the camera for still image capture with the various still modes available via the Function/Set button.
Four-Way Arrow Pad: This four-way rocker button is located to the right of the PowerShot SD30's LCD monitor and serves multiple functions. In any Settings menu, the arrow keys navigate through menu selections. In Record mode, the Left arrow selects between Single, Continuous and Self-Timer modes. The Right arrow selects the Flash mode, cycling through Automatic, Red-Eye Reduction, Forced On, Forced On with Red-Eye Reduction, Forced Off, and Slow-Sync settings. The Up arrow zooms in and the Bottom arrow zooms out.
In Playback mode, the Up arrow magnifies the image (pressing the Function/Set button subsequently enables scrolling around the enlarged image), and the Down arrow calls the Delete menu, while the right and left arrow keys scroll through captured images and movie files. When you zoom in on an image, all four arrows pan the view.

Function/Set Button: To the lower left of the four-way arrow pad, this control displays available options in any Record mode, and confirms selections once any menu has been invoked. In Playback mode, it activates Index Playback, in which up to nine images are displayed at once on the LCD. When used in Still Recording mode, the following options are available on the PowerShot SD30 (not all options being available in all modes):
 Shooting Mode: Selects among the available shooting modes: Auto, Manual, Macro, Portrait, Landscape, Night Snapshot, My Colors, and the Scene modes. In Movie Mode the options are Standard, Compact, and My Colors.
- Exposure Compensation: Increases or decreases the exposure from -2 to +2 exposure equivalents (EV) in one-third-step increments.
- ISO: Selects between Auto, 50, 100, 200 and 400 ISO equivalents.
- White Balance: Controls the color balance of images. Options are Auto, Daylight, Cloudy, Tungsten, Fluorescent, Fluorescent H, and Custom (manual setting).
- Photo Effect: Enables Vivid Color (high color saturation), Neutral Color (low color saturation), Low Sharpening, Sepia, or Black-and-White picture effects, or disables the effects altogether.
- Metering: Sets the camera's metering mode to Evaluative, Center-Weighted, or Spot.
- Resolution: Specifies the image resolution. Still image resolutions are 2,592 x 1,944; 2,048 x 1,536; 1,600 x 1,200; and 640 x 480 pixels; a Postcard mode also takes the resolution to 1600 x 1200 and locks the resolution to Fine; a date stamp can be printed on the image in this mode, and the top and bottom of the screen are greyed out when you half-press the shutter button, showing the portions of the image that won't fit on a 4x6 postcard. Pressing the Menu button allows you to select Compression settings of Superfine, Fine, or Normal. Movie resolutions are 640 x 480, and 320 x 240 pixels.

Menu Button: Lower right of the Four-way nav controls, this button accesses either the LCD menu system in both Record and Playback modes or options in the various Recording modes.

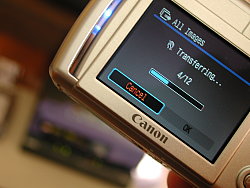
Print/Share Button: Located to the upper left of the SD30's Four-way nav, the Print/Share button is used for activating uploads to Windows computers or connections to a variety of compatible printers, including those complying to the PictBridge standard. The button glows blue when ready to print or transfer images, and flashes blue when printing or transferring images.
Camera Modes and Menus
Playback Mode: This mode allows you to scroll through captured images and movies, write-protect images, view a nine-image index display, zoom into a captured image, delete unwanted images, rotate images, set up images for printing on DPOF compatible devices, as well as play and edit movies on the Canon SD30.
Movie Mode: Records movie clips with sound in one of three modes. Focus and optical zoom are fixed at the first frame but digital zoom is available. Movie modes include Standard capture at 640 x 480 images at 10 frames per second up to 1-GB, Compact capture at 160 x 120 at 15 fps for emailing up to three minutes, and My Colors capture at 320 x 240 at 20 fps up to 1-GB.
Record Mode: Sets the PowerShot SD30 for still image capture. Pressing the Function/Set button lets you choose among Auto, Manual (similar to Program Auto), Macro, Portrait, Landscape, Night Snapshot, My Colors, and Scene (with choices being Kids & Pets, Indoor, Foliage, Snow, Beach, Fireworks, and Underwater).
Record Menu:
 AiAF: Turns on the AiAF focus system. If switched off, the camera bases autofocus on the center of the frame.
- Self-Timer: Sets the Self-Timer countdown to two or 10 seconds, or lets you specify a custom timer. The custom timer can have a delay of 0-10, 15, 20, or 30 seconds, and allows multiple shots (from one to ten in total) to be captured. If the camera is set to capture multiple shots, these are captured with an interval of about one second between shots, enough time for the flash to recharge if required. Focus and exposure are locked from the first shot. (A very handy feature for getting good shots of groups, as someone invariably blinks right as the shutter goes off.)
- AF Assist Beam: Turns the AF assist light on or off. If on, the bright orange LED on the camera's front automatically illuminates in low lighting.
- Digital Zoom: Enables the SD30's 4x digital zoom function, which is engaged by zooming past the optical zoom range. Also disables digital zoom.
- Review: Turns the instant review function on or off, sets the amount of time that the captured image is displayed on the screen from two to 10 seconds, or allows a "Hold" mode where the image remains on the screen until the shutter button is half-pressed. The instant review function applies to still images only.
 Save Original: Toggles whether the camera records an original unaltered image with any My Colors image.
- Grid Lines: Enables or disables display of grid lines to help align shots or compose using the rule of thirds.
- Date Stamp: Activates the Date Stamp feature, which imprints the date (and optionally, the time) on the lower right of images captured in "Postcard" mode only.
- Long Shutter: Enables or disables longer shutter times. When enabled, the EV compensation option available when you press Function/Set button, will shift into Long Shutter mode when you press the Menu button. You can then select shutter speeds among 1.0, 1.3, 1.6, 2.0, 2.5, 3.2, 4.0, 5.0, 6.0 8.0, 10.0, 13.0, and 15.0 seconds.
- Vertical Shutter: Allows the Function/Set button to release the shutter when the camera is held vertically.
- Stitch Assist: Sets the shooting direction from left to right or right to left and starts the sequence, aligning shots until you press the Menu button to escape Stitch Assist mode.
Setup Menu:
 Mute: Turns the camera's beep sounds on and off, although warnings will still sound.
- Volume: Individually sets Startup, Operation, Self Timer, Shutter, and Playback volumes. Five steps are available for each item, or the sound for each item can be disabled individually.
- Info Display: Toggles displays modes on or off for Shooting Info and Review Info. For Replay Info, it selects between Detailed, Standard, or Off.
- LCD Brightness: Adjust the brightness of the LCD backlight, with 15 steps of control available.
- Power Saving: Toggles the camera's automatic shutoff function, which turns off the camera after a period of inactivity. Also sets display shutdown time to 10, 20, or 30 seconds, or to 1, 2, or 3 minutes.
- Time Zone: Sets both a Home and World (away) time zone, so you can simply select one or the other to record date and time settings for that location. Setting a time zone displays a world map with scrollable time zones and major city names for each zone, making it easy to select a location.
- Date/Time: Sets the camera's internal calendar and clock, as well as the format for dates (mm/dd/yy, dd/mm/yy, or yy/mm/dd).
 Clock Display: Controls the PowerShot SD30's clock display option, which shows the current time (but not the date) for a period of 0-10, 20 or 30 seconds or for 1, 2 or 3 minutes when the Function key is pressed and held for two seconds. (Handy if you forgot your wristwatch, I guess.) If set to zero, the clock is displayed only while the Function button is held in.
- Format: Formats the Secure Digital card, erasing all files (even those marked for write-protection). An optional is available to low-level format the card.
- File Numbering: Resets file numbering with each new Secure Digital card when set to Auto Reset. If set to Continuous, the camera continues numbering in sequence, regardless of memory card.
- Create Folder: Immediately creates a new folder on the memory card to store images or creates the folder at the day and time you specify.
- Auto Rotate: Toggles Auto Rotate feature on and off. The camera can detect when the camera is held approximately level, or when it is rotated left or right beyond approximately 45 degrees. If you aim the PowerShot SD30 vertically up or down, it will remember the orientation before you did so -- hence letting you control which orientation an image is tagged with even for shots where the camera is tilted enough vertically to prevent the sensor working.
- Language: Sets the camera's menu language to one of a whopping 22 choices. English is the default setting.
- Video System: Sets the camera's video-out signal to conform to NTSC or PAL timing.
- Reset All: Resets all non-custom camera settings to their default values.
My Camera Menu
 Theme: Selects a common theme for each My Camera menu settings item. Four options are available, the first one being Off. When a theme is selected, all of the following settings automatically adjust to that theme. Users can also select and upload their own sounds to the camera.
- Start-Up Image: Sets the startup image when you turn on the PowerShot SD30 to: Black screen, Canon logo, Canon logo with sunset, and nature scene. You can also apply your own image using the Canon software.
- Start-Up Sound: Sets the startup sound when you turn on the camera to: No sound, Musical tone (1), Musical tone (2), or Birds chirping.
- Operation Sound: Sets the sound when any control or switch is used (except the Shutter button). Options include no sound, Beep, Musical tone, and Chirp.
- Self-Timer Sound: Sets the sound that signals you when the shutter release is two seconds away. Options include no sound, Fast beeps, Telephone ring, and Howling.
- Shutter Sound: Sets the shutter sound that you hear when you depress the Shutter button (there is no shutter sound in Movie mode). Options include no sound, Shutter sound, Musical Tone, and Bark.
Playback Menu System: Accessed by pressing the Menu button in Playback mode, the Playback menu also has subject tabs for the Setup and My Camera menus. Since these were described above, I won't repeat them here.
Playback Menu:
 Protect: Marks the current image for write-protection, or removes write-protection. Protected images cannot be deleted or manipulated, except through card formatting, which erases all files.
- Rotate: Rotates the current image. The first press gives a 90 degree clockwise rotation; the second press rotates the image 90 degrees counterclockwise from the original position. On the third press, the image returns to its original orientation. The image data is not actually rotated; the PowerShot SD30 actually sets a tag in the EXIF header, hence your software must recognize this tag to be able to recognize the orientation set in-camera.
- Sound Memo: Records a short sound clip to accompany a captured image.
- Erase All: Erases all files on the memory card, except protected ones.
- Slide Show: Automatically plays all captured images in a slide show.
- Print Order: Determines how many copies of the current image will be printed, with options for creating an index print, imprinting the date and time, and imprinting the file number.
- Transfer Order: Select images for downloading to your computer.
- Transition: Select a fade or wipe transition between images as they are displayed or disable the effect.
Print Connection: When you connect the Canon SD30 to a PictBridge, Canon Direct Print, or Bubble Jet Direct-compatible printer, a new menu is enabled, allowing easy print to a number of basic paper sizes, all without a computer. A special icon appears in the upper left hand corner, with the word SET right next to it, telling you that to adjust settings, you should press the Set button. You can select not only the size and type of paper, but you can also crop the pictures right in the camera. If you only print one size, full frame, you need only press the Print/Share button and printing of the current image begins immediately at whatever default settings were used last.